Using Exploodo
Exploodo is a Cloud Learning Management System (Cloud LMS) for creating and releasing e-learning courses. Publishing your own courses as web-based trainings (WBT) is possible within just a few minutes. Via the Exploodo market place, you can also purchase or sell courses.
1. Registration
- On the Exploodo website (https://www.exploodo.com), you can register by clicking on "Sign up" in the top right corner.
- After filling out the registration form, you will be signed up in our system and will be able to use the software immediately.
- We will send you a verification code to confirm your e-mail address. Please fill in the verification code to complete the registration process.
2. Adding courses
- Select "Marketplace" in the menu on the top left to view all the available Exploodo courses.
- Using the menu on the top left, you can filter courses by category. With the search box on the top right, you can search for a specific course.
- Once you have found the course you were looking for, hover over the course image with your cursor and click on "Add to Cart".
- In the cart, you can enter your desired amount of licenses and see the total price.
- After clicking on "Checkout", you can see all your order details again and continue the order process (further details can be found in the article Account and Billing)
- Courses which are marked as "Free" can be used free of charge.
3. Adding courses to trial version
- Select "Marketplace" in the menu on the top left to view all the available Exploodo courses.
- Using the menu on the top left, you can filter courses by category. With the search box on the top right, you can search for a specific course.
- Once you have found the course you were looking for, hover over the course image with your cursor and click on "Add to Cart".
- In the cart, you can enter your desired amount of licenses and see the total price.
- After clicking on "Checkout", you can see all your order details again and continue the order process (further details can be found in the article Account and Billing)
- Courses which are marked as "Free" can be used free of charge.
4. Editing courses
- If you want to edit texts or images in one of your courses, you can start the integrated Authoring Tool by clicking on "Edit Content" (further details can be found in the article "Authoring Tool").
- If you click on the menu item "Learning Management", you will see a section called "Users". In this area, you can "Add Users" and assign user permissions.
- You can assign courses to users via groups. All users are automatically assigned to the group "All Users".
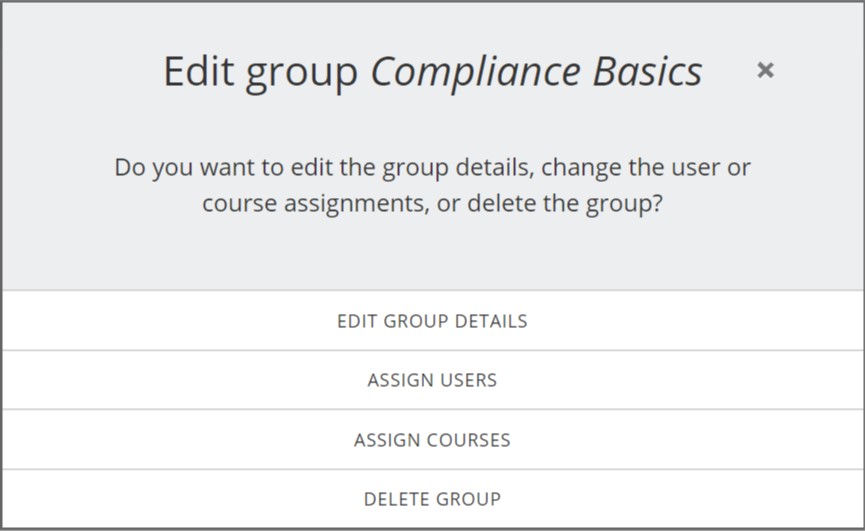
- Under the menu item "Groups", you can create and edit user groups (add courses from your library, assign users etc. - see screenshot).
- Create test users (in the menu "Users" - add users) and assign a course to them by selecting the course in the "Roll Out" menu and clicking on "Assign Users". Next, select the group "All Users" and save.
5. Rolling out courses
- Start rolling out your course to users by clicking on "Roll out Course" ("Learning Management" - "Roll Out").
- In this area, you can see your selected courses and if you hover over the course image with your cursor, you can choose between "Assign Users" and "Roll Out Course".
- After clicking on "Roll Out Course", select "Named User Roll-Out", click on the recipients of your choice and then on "Next".
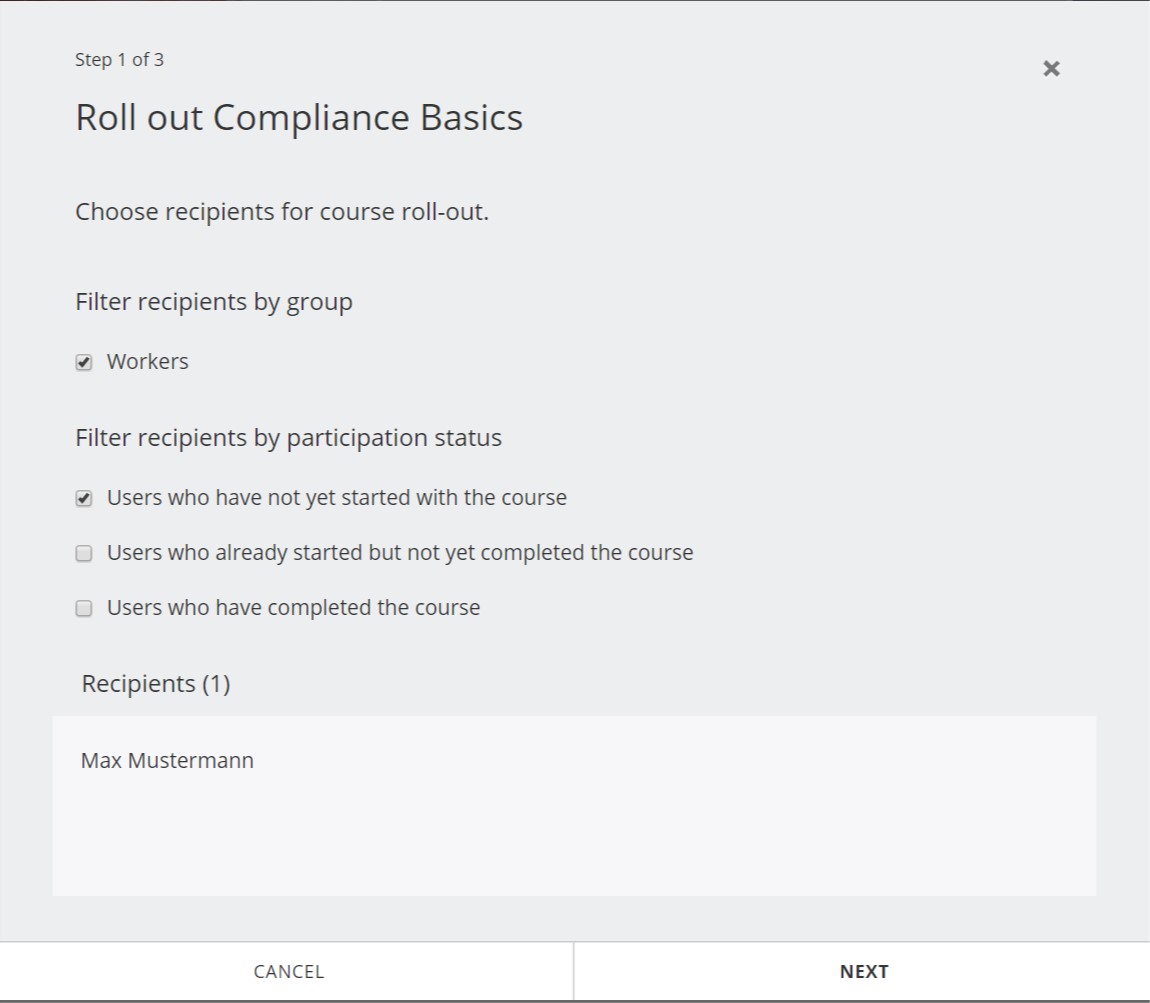
- Under the heading "Filter recipients by group", select the group of your choice. Then, below the item "Filter recipients by participation status", click on the option "Users who have not yet started with the course" and proceed by clicking on "Next".
- Now, you can either create a list of personalized login links for your users and send out the links via an e-mail tool of your choice or use the integrated Exploodo notification tool to send the links.